MintScript Learn
Three Entry Models You Can Actually Follow
Location → trigger → invalidation → target. Pick one model, respect no-trade conditions, and don’t count “missed” moves that never triggered.
Your plan needs an entry rule “Looks bullish” gives you an opinion. A model tells you when to act, when to wait, and when the trade never existed. Pick one model to practice before combining all three.
These are explicit teaching templates. They are not backtested profitable strategies. Every variant needs its own evaluation on the instrument, feed, session, and execution you use.
Model one: reclaim and retest Use a previously marked support level or range low. On the chosen setup timeframe, price trades below it and closes back above it. Then wait for a retest from above and a bullish rejection close on the trigger timeframe. The example stop is below the retest swing; the target is a premarked obstacle above.
A wick below the level without a close back above doesn’t meet the reclaim rule. If the retest breaks down before the trigger, no entry. If the retest never comes, no entry. The liquidity lesson covers the underlying sweep concept; here we’re turning the sequence into an execution rule.
Synthetic trade: level 100, reclaim, retest, trigger at 102, stop 99, first objective 108. That is six points of potential reward for three points of price risk: 2R before costs. If the trigger arrives at 105 with the same stop and target, the geometry is different. Don’t use the earlier ideal entry in your journal.
Model two: breakout and retest Mark resistance before the break. Require a completed setup-timeframe close above it. Wait for the first retest from above and a bullish rejection close on the trigger timeframe. Place the stop beyond the retest structure and check the next obstacle.
For practice, allow at most six setup-timeframe bars for that retest. This is an arbitrary test parameter that prevents an endless wait; it isn’t a proven optimum. If you change it, label a new version.
Failure case: a break above resistance closes back inside and the retest fails. The long model is canceled. That doesn’t automatically activate a short unless your separate short model qualifies.
Model three: displacement and FVG retest Require a displacement close through a selected swing, followed by a completed FVG in the same direction. Wait for the first revisit and a rejection trigger from that zone. Define the stop beyond the reaction swing and a target at the next meaningful obstacle.
Keep the gap formation timeframe fixed. A gap on a smaller chart isn’t a substitute if the required larger-timeframe gap never forms. The FVG lesson explains the pattern and inversion rules; this model focuses on executing one specific sequence.
One setup, one model ID A single trade can contain a reclaim, a breakout, and an FVG. Don’t record it as three independent successful trades. Choose the entry rule that actually caused the order and record that model ID.
A limit fill and a rejection-close entry are different versions. So are wick stops and close-based analytical invalidation. Write the exact variant in the journal.
The no-trade rules matter Skip when the trigger is missing, the next obstacle is too close, the spread makes the stop impractical, or the required candle hasn’t closed. Decide how you handle scheduled macro releases before the session rather than improvising in a fast market.
No model should require increasing risk after a loss. Position size follows the planned stop and risk budget. It doesn’t follow how badly you need the trade to work.
Review execution separately from outcome A clean loss can follow the model perfectly. A messy win can violate it. Score rule adherence first, then measure net R, fill quality, and whether the target was realistic. That makes the journal useful even before you have enough observations to judge performance.
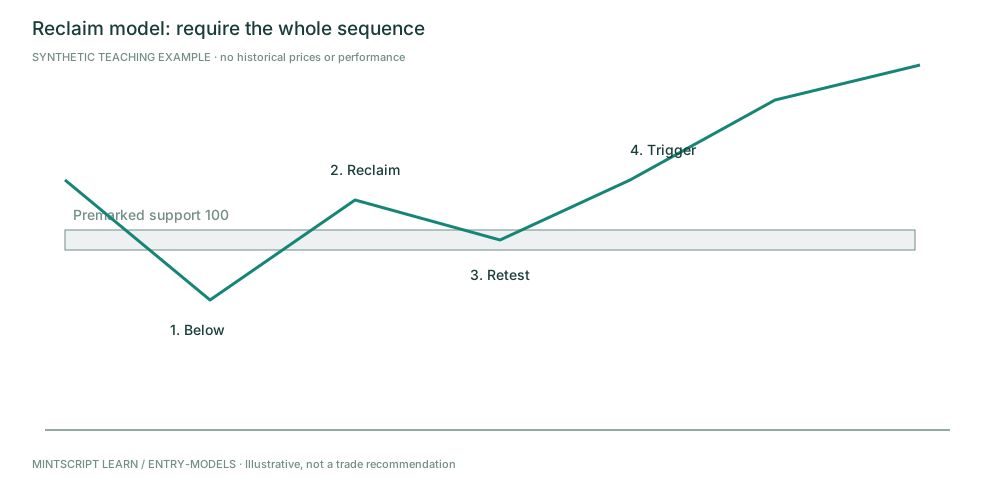
The long entry is conditional on the trigger. The earlier low is not a hindsight fill.
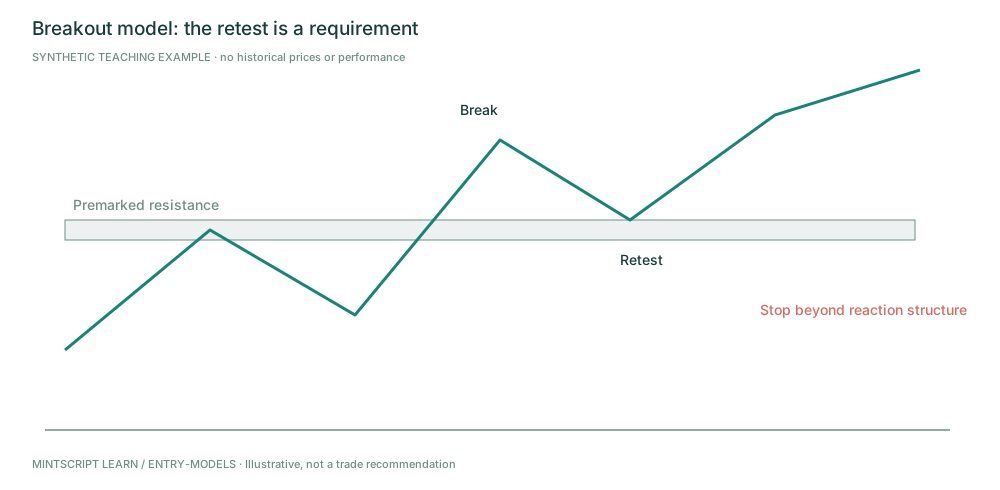
A move without the required retest belongs outside this entry model.
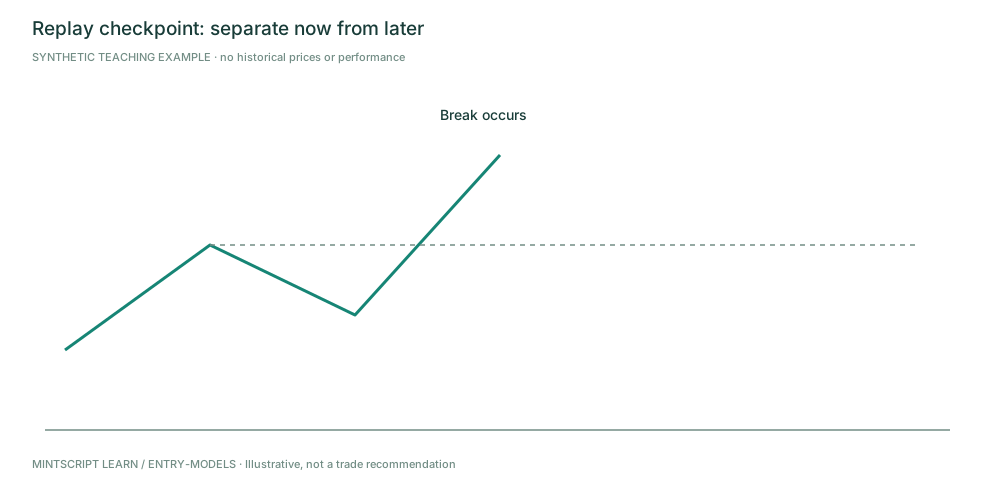
Hide the future. Describe what is known before revealing the later information.
Practice checkpoint
Your reclaim model requires a retest and rejection close. Price reclaims and immediately rallies to the target without a retest. Is this a missed model trade?
Worked answer (peek after you decide): It is a missed market move, not a valid model entry you failed to execute. Record “no trigger.” Don’t add a hypothetical winner to the model’s results.
Source and editorial notes
Original MintScript Learn framework. All charts and numerical examples are synthetic teaching paths — not historical trades, backtests, or performance claims. SMC / indicator labels use the explicit conventions in this lesson; they are not standardized market facts. No win rates or “institutional order” claims are asserted.
Desk features referenced: Struct · FVG · VP · Heat · Markets · ATR stops.