MintScript Learn
Order Blocks, Breakers, and Mitigation
Draw fewer zones. An order block only earns the label after displacement qualifies it — and a failed block isn’t automatically a short.
Start with the reaction you can verify “The last down candle before a move up” describes a lot of candles. On its own, it doesn’t explain why that particular candle should matter next time.
For this lesson, a bullish order-block candidate is the last bearish candle before bullish displacement that closes through a selected swing high. A bearish candidate is the reverse. Mark the full high-to-low range of that candle for the base model. If you want to test body-only zones later, keep them as a separate variant.
The word order block belongs to a chart framework. A candle doesn’t prove that institutional orders remain there. What we can observe is the displacement, the structural break, and the later reaction.
The zone needs context Before marking it, identify the swing broken by the departure. Was that swing selected before the break? Was the departure forceful relative to nearby candles? Is the candidate sitting near higher-timeframe support or resistance, or floating in the middle of a range?
An overlapping FVG can help describe the same displacement, but don’t count the candle, the gap, and the structural break as three independent confirmations. They may all come from one price event.
A practical bullish candidate Synthetic example: the final bearish candle before an advance has high 102 and low 100. The next move closes through a selected high at 106 and reaches 112. Mark 100–102 after that qualifying break, not before it.
On the return, a confirmation model waits for price to enter the zone and then produce a bullish rejection close. A possible stop lies below the reaction swing. The next resistance is the first obstacle to check before choosing a target. If the zone is reached after price has already broken the broader bullish structure, reassess instead of buying it because it’s still drawn.
When failure creates a breaker candidate Suppose the bullish zone fails with a formation-timeframe close below 100. That failure alone doesn’t create a short entry. For a bearish breaker-style example here, require the failed bullish zone, a bearish structural break, and a retest of 100–102 from below that rejects.
The failure gives you a candidate. The retest gives you a place to observe. Your trigger gives you an entry decision. Keep those steps separate.
Some SMC definitions also require a preceding liquidity event. Terminology differs, so this lesson’s breaker-style rule is explicitly narrower than a universal definition. Document any additional requirements when testing it.
What about mitigation blocks? “Mitigation” is often used for a revisit to a prior origin area; some traders reserve mitigation block for a particular failed-swing pattern. Don’t combine those usages silently. For this guide, tag a revisit as a mitigation event without assuming it identifies a separate institutional process.
If you use a specific mitigation-block pattern, write the swing sequence and boundary rule before adding it to the strategy. Without that, you’re likely giving an order block a new name after seeing the result.
The trap is endless redrawing A wide wick zone fails, so you shrink it to the body. The body fails, so you switch timeframes. Eventually something appears to hold. That may produce a nice screenshot, but it gives you no repeatable rule.
Save the original boundaries and outcome. Track first visit, later visits, structural context, and trigger. A zone can be analytically interesting while offering no valid trade. Let it stay that way.
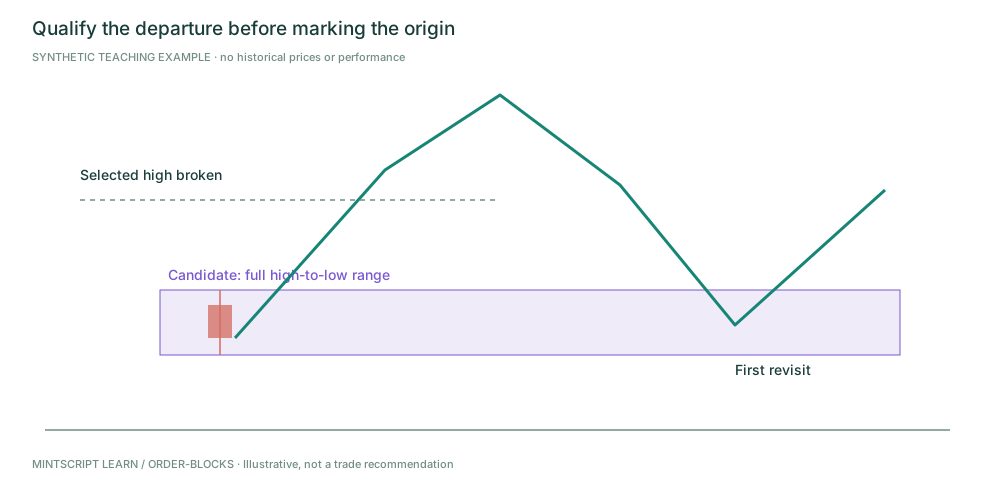
The qualifying displacement and break must exist before the candidate is marked.
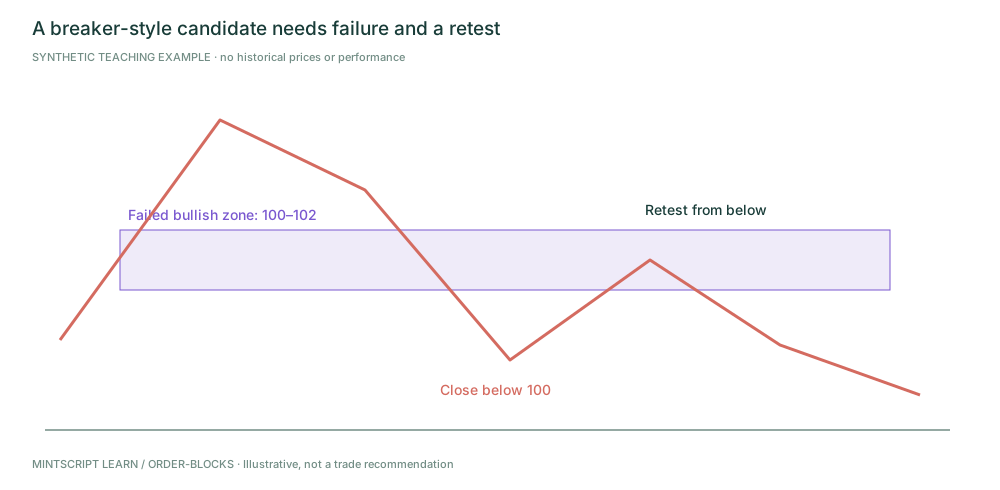
This is the lesson’s explicit breaker-style convention, not a claim of visible institutional inventory.
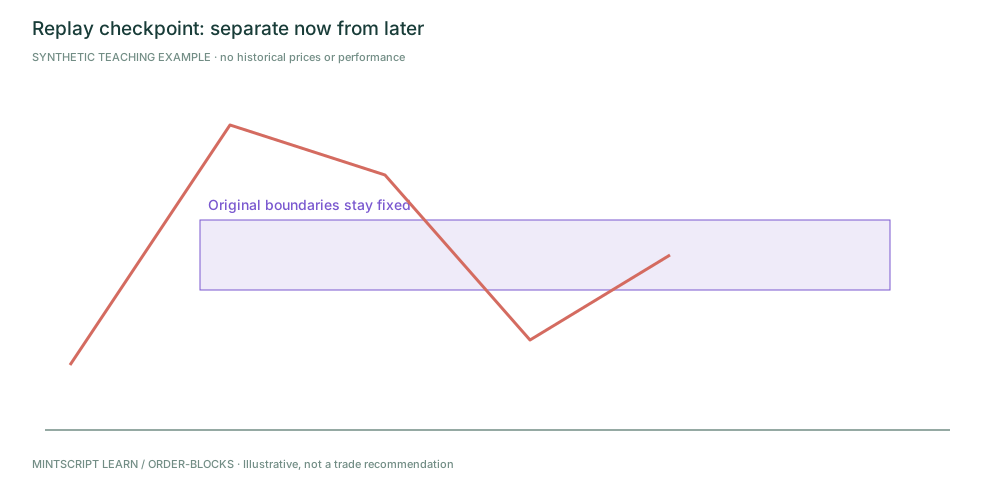
Hide the future. Describe what is known before revealing the later information.
Practice checkpoint
A bullish candidate at 100–102 closes below 100, then returns from below. Is touching 101 enough to short?
Worked answer (peek after you decide): No. Under this model, the bearish structural break and rejection trigger must also exist. A failed bullish zone is not automatically a working bearish one.
Source and editorial notes
Original MintScript Learn framework. All charts and numerical examples are synthetic teaching paths — not historical trades, backtests, or performance claims. SMC / indicator labels use the explicit conventions in this lesson; they are not standardized market facts. No win rates or “institutional order” claims are asserted.
Desk features referenced: Struct · FVG · VP · Heat · Markets · ATR stops.